|
Warfare Incorporated
User's Guide

Table of Contents
Introduction
Installation
Registration
and Technical Support
Warfare Incorporated Usage
Getting Started
Begin New Game
Playing a Challenge Mission
Selecting a Story Mission
Changing the Game Options
Options
Game
Sound
Performance
Color
Display
Game Play Controls
Menu
Useful Indicators
The Mini Map
Game Icons
In Game Menu
State Objectives
Options
Saving Your Game
Loading a Saved Game
Restart Mission
Abort Mission
Exit Game
Personnel
Security Guard
Rocket Trooper
Corporate Raider
Vehicles
SR-98 Eagle
T-29 Broadsword
M-18 Hydra
T-33 Liberator
G-4 Bullpup
H-7 Dominion
A-3 Cyclops
Buildings
Headquarters
Power Generator
Galaxite Processor
Galaxite Storage Warehouse
Human Resource Center (HRC)
Vehicle Transport Station (VTS)
Surveillance Center
Research & Development Center
Gatling Tower
Rocket Tower
Research Upgrades
Advanced Features
Graffiti Scroll
Button Scroll
Selecting Multiple Units
Tips
Building Options
Transforming your Headquarters
Changing the game difficulty
Reaching your Unit Limit
Speed Ecom Display
Switching Applications
Credits
Company Information
License Agreement
Copyright and Trademark
Information
The year is 2065 and mega corporations rule the galaxy. Two of the largest companies, ACME Exploration and OMNI Industries, are vying for dominance in the mining of an extremely rare and incredibly valuable mineral called Galaxite. Galaxite can be used to 'rip' particles from one location to another almost instantly and over any distance. This is accomplished by creating matching quirk fields which, when synchronized, create a momentary Einstein-Rosen wormhole bridge between the two locations. OMNI Industries is the largest corporation in existence with a Gross National Product (GNP) that exceeds that of all but the richest countries. OMNI has a stranglehold on a variety of different markets ranging from diamonds to Galaxite mining. ACME Exploration is the second largest corporation in existence and is urgently trying to secure the number 1 spot.
Six weeks ago an ACME owned, unmanned probe en route to the star Tau Ceti reported back that an unexplored planet, Icarus, contained 'massive' Galaxite deposits. ACME has dispatched a colony ship to the location. On board are Gordon Fox, Mining Base Commander, Jana Perez, a Senior Research Scientist, her fiance, Andy Whitmore, a Mining Operations Trainee, and Arthur Olstrom, a Sr. Mining Executive; it includes the equipment and people necessary to exploit and defend their claim. If ACME can successfully claim Icarus it may well become the richest and most powerful mega corporation of them all!
Palm OS:
Run the Warfare Incorporated Installer and follow
the on screen instructions. You will be required to HotSync your
handheld to complete the installation. The installer installs the
following files:
- Warfare Incorporated.PRC
-- The Warfare Incorporated game.
- Warfare IncorporatedA.PRC -- The
Warfare Incorporated game for Palm OS 5 devices.
- Mission Pack Manager.PRC --
Mission Pack Manager for additional Warfare Incorporated missions.
- htsfx.pdb -- Warfare Incorporated
sound file.
- htdata416.pdb -- Game graphics
for grayscale devices.
- htdata816.pdb -- Game graphics
for low resolution devices.
- htdata824.pdb -- Game graphics
for high resolution devices.
- MQGX.prc -- Optional graphics
accelerator for m130 and Sony Clie devices.
- Warfare Incorporated User Guide
-- This User Guide.
Pocket PC:
Run the Warfare Incorporated Installer and
follow the on screen instructions.
- WarfareInc.CAB -- The Pocket
PC application files installed on your handheld.
- Warfare Incorporated User Guide -- This
User Guide.
When you launch Warfare
Incorporated you will be prompted to enter a
serial number or to run in
demo mode.
To purchase a product serial
number, please visit our web site at www.handmark.com.
Technical
Support
If
you have a software problem you can't solve, please visit the Support
section on our web site:
www.handmark.com/support. If you need assistance from a technical
support representative you can submit a request from this page.
GETTING STARTED
To begin a new game, or continue after completing the sampler mission and registering, refer to Begin New Game. Once you begin, if you switch away to another program using a device button, turn off your device, or you select "Exit Game" from the In Game Menu, your current place in the game will be preserved. If a mission ends in failure you will have an option to retry that mission. If you wish to preserve incremental progress within a mission, you can save the game at any time. Choosing Abort at the end of a mission will abort your game.
BEGIN NEW GAME
This launches you into Mission 1, a training mission which is an excellent place to start. You'll learn how to create buildings, build units and move your forces around. However, there are some features that are not covered in the training mission and are helpful to know ahead of time. Refer to Advanced Features for more information. As you finish each mission you will be taken to the next mission in the adventures of Andy, Jana, Olstrom and Fox. Watch your rank increase with each successfully completed mission.
PLAYING A CHALLENGE MISSION
If you would like to play a challenge mission tap "Play Mission" on the Main Menu. From the Play Mission Menu select "Play Challenge Mission" and you are presented with a list of missions to choose from. Tap on a mission to highlight it and then tap the "Play" button.
SELECTING A STORY MISSION
To maximize replayability, you can re-play individual story missions. From the Main Menu select "Play Mission". Then from the Play Mission Menu select "Play Story Mission". You can select any of the fourteen story missions. Note: if you launch the story missions in this way rather than playing through the game from the beginning, you will not be able to attain the top rank possible in the game. To start as a trainee and complete as a CEO you should use the Begin New Game option on the Main Menu.
CHANGING THE GAME OPTIONS
If you would like to adjust the audio, display, or game settings tap on the Options button in the Main Menu. Options are also accessible from the In Game Menu.
OPTIONS
GAME
You can adjust the game speed by adjusting the slider to the right for faster game play and to the left for a slower game play. Once the game is playing as fast as the device allows, increasing the game speed will not have an effect.
You can check the Lasso Selection box to change the way you select multiple units, from tapping and dragging a square containing the units you would like to select, to freehand drawing a loop around the units you would like to select.
There are three difficulty settings for the game. This setting can be changed at any time and will take effect immediately.
Tapping the Default button will restore all three settings: game speed, lasso selection and difficulty, to their default values.
SOUND
Moving the volume slider to the right will increase the audio volume, moving it to the left will decrease the audio volume.
You can mute all game sound by selecting the Mute checkbox.
PERFORMANCE
For very low-end Palm devices, performance of the game can be improved by turning off some graphics options. By default these are all on.
COLOR
On some devices the game will benefit from adjustments to the Hue, Saturation and Brightness. We have included default settings for several devices. Select this option from the In Game Menu to see the Warfare Incorporated background and units as you make adjustments. There are two different types of terrain: grass and desert. Experimentation may be required.
Selecting the Default button will return all three values to their default setting.
DISPLAY
Some devices can display multiple screen resolutions. Some devices are capable of displaying in a landscape mode. If your device is capable of more than one display configuration you will have multiple choices here. These will be formatted as follows: horizontal-pixels x vertical-pixels, color if your device can do color, high or low resolution as suits your device and then degrees of rotation from the default display orientation if your device supports it.
GAME PLAY CONTROLS
MENU
While playing Warfare Incorporated you can access the In Game Menu by tapping on the "Menu" button in the bottom-left corner of the display. The game will pause while you are looking at the In Game Menu. Selecting Back will return you to gameplay.
INDICATORS
To the right of the Menu button is your Credit Indicator. It shows your current financial resources. The dollar symbol will flash if you are too low on credits to complete a task. Note that the building constructing units when you run out of credits will also flash a dollar sign. If you have no Bullpups you can sell a building to get more credits to continue unit production. Sell a Galaxite Warehouse only as a last resort, you will lose its contents when you sell.
To the right of the Credit Indicator is your Power Indicator. It shows your current power supply in bars and your current demand with small triangles above and below the bars. The power symbol will flash when your power is too low. On color devices the bars will be green when you have plenty of power, yellow when you have just enough power and red when your power is too low.
MINI MAP
In the lower right-hand corner of your screen is a satellite overview of the nearby region. There is a square inside that shows which part of the region is currently displayed on your device. Use your stylus to tap and drag that rectangle to change your view.
GAME ICONS
POP UP MENU ICONS
White Hammer: used to display build menu for selected resource
Shaded Hammer: indicates that the selected resource is currently building something. If you tap the shaded hammer, the resource stops unit construction and your credits are returned.
White Wrench: Indicates that the selected resource is damaged and needs repair. Note that repairing a building consumes credits. If you are low on credits you may wish to wait on repairing a non-critical building.
Grey Wrench: Indicates that the selected resource is not damaged.
White Dollar Sign: Can be used to sell a resource. Your entire investment will not be returned.
However, sometimes it is necessary to sell one resource to create a more critical one. Be aware that selling a Galaxite Warehouse will lose any credits it contains.
PLACE BUILDING ICONS
When you tap the HQ and select build, the Order Building screen is displayed. Once you select something to build you then get a hashed square which represents the footprint of the building. There are two icons associated with the hashed square:
White Check Mark: When you have no dark hash marks, you can select the white check mark to confirm building placement.
White X: Select the white x to cancel construction of the building.
IN GAME MENU
STATE OBJECTIVES
You can review your mission objectives at any time by selecting State Objectives from the In Game Menu The Statistics button will show you your current statistics and promotion level. The elapsed time shown is in game time, if you have altered the game speed this will differ from real time. You can more quickly access the objectives screen by tapping the Credit Indicator visible while playing the game.
OPTIONS
This will take you to the game options.
SAVING YOUR GAME
While playing you can save your progress from the In Game Menu by tapping on the "Save Game" button. Select the slot where you would like to save your game and then tap the "Save" button.
LOADING A SAVED GAME
Once you have saved a game you can load it again by tapping the "Load Saved Game" button from the Main Menu. You will see a list of all the games that have been saved. Tap on the one you would like to load and then tap on the "Load" button. The saved games are named with the time saved (in 24-hour time) followed by the name of the mission.
RESTART MISSION
At any time during the mission you can choose to restart that mission by choosing Restart Mission. It will put you back at the beginning of the mission with the promotion level you had when you began that mission.
ABORT MISSION
Choosing Abort Mission will return you to the game main menu without preserving your game. You may wish to save your game before choosing this option.
EXIT GAME
Choosing Exit Game will completely exit Warfare Incorporated and preserve your current view and play status. Your game will continue from there the next time you play Warfare Incorporated.
PERSONNEL
SECURITY GUARD

Security Guards are cheap and cheerful but with limited firepower and defensive capabilities. The Security Guard is useful as a scout and is very effective in large groups.
Cost: 150
Armor: Light
Damage: Low
Speed: Medium
Range: Medium
ROCKET TROOPER

Rocket Troopers are particularly effective against armored vehicles. They pack a bit more punch and have a longer range than a security guard but can't travel as quickly.
Cost: 300
Armor: Light
Damage: Low
Speed: Slow
Range: High
CORPORATE RAIDER

Every organization's worst nightmare. Send a Raider into an enemy building and it becomes yours! Corporate raiders need to be carefully protected since they have very little armor and no conventional weapons. Each raider can be used once.
Corporate Raiders are available from the Human Resources Center after completing the HRC upgrade from the Research & Development Center. Note that the R & D Center must be intact for you to build the Corporate Raiders. If you sell the center or it is destroyed by enemies you will no longer be able to create Raiders.
Armor: Light
Damage: None
Speed: Slow
Range: LowVEHICLES
SR-98 EAGLE

The SR-98 is a light, speedy tank that comes equipped with a machine gun. They aren't particularly powerful on their own but are very effective in groups and make nice scouts.
Cost: 300
Armor: Light
Damage: Medium
Speed: Fast
Range: High
T-29 BROADSWORD

The T-29 comes equipped with a large mortar cannon that does a lot of damage. It is effective in combat with other units and particularly effective against buildings.
Cost: 450
Armor: Medium
Damage: High
Speed: Medium
Range: High
M-18 HYDRA

The Hydra shoots high-explosive rockets that pack a large punch ideal for armored vehicles. It is very well rounded making it an excellent candidate for both offensive and defensive roles.
Cost: 450
Armor: Medium
Damage: High
Speed: Medium
Range: High
T-33 LIBERATOR

The Liberator comes equipped with dual-cannons which allow it to make short work of enemy infantry.
Cost: 600
Armor: Heavy
Damage: High
Speed: Medium
Range: High
G-4 BULLPUP

The G-4 Bullpup gathers Galaxite and returns it to your Processor. Order more to harvest faster or replace ones that have been destroyed. Their tough armor can get them through trouble spots but they often need to be guarded as they have no offensive capabilities.
Cost: 600
Armor: Heavy
Damage: None
Speed: Medium
Range: None
H-7 DOMINION

The H-7 Dominion transforms into an HQ allowing you to start a new base anywhere you want. It has strong armor but no weapons. Once transformed it cannot be remobilized by the player. The Dominion is available from the Vehicle Transport Station after completing the VTS upgrade from the Research & Development Center.
Cost: 1200
Armor: Heavy
Damage: None
Speed: Slow
Range: None
A-3 CYCLOPS

The A-3 Cyclops is a long range artillery unit particularly effective against buildings. Almost any other offensive unit can destroy it, so it should be escorted by other defensive units.
Cost: 500
Armor: Light
Damage: High
Speed: Slow
Range: High
BUILDINGS
HEADQUARTERS
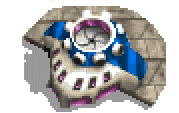
Your entire base is built around your headquarters (HQ). Without it you are unable to create new buildings and as such it should be carefully protected from enemy attack.
Armor: Heavy
Damage: None
Power Demand: 0
Power Supply: 0
POWER GENERATOR

Power Generators supply the rest of your buildings with power. Running low on power reduces the function of many structures making it imperative that you keep an eye on your power supply. A lightening bolt symbol will flash on underpowered units. Note that when the lightening bolt is flashing, these buildings will not function as expected. For example, Rocket Towers will no longer fire. When it is your own Rocket Tower that is disabled, this spells bad news for you. However, when enemy towers are underpowered you can take full advantage of their helplessness!
Cost: 750
Armor: Light
Damage: None
Power Demand: 0
Power Supply: 40
GALAXITE PROCESSOR
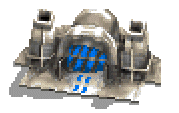
A Galaxite Processor is used to process mined Galaxite and provides funding for your operation. It should be well defended. If the Bullpup remains in the processor, it usually indicates that you need to build a Galaxite Storage Warehouse. When Bullpups are destroyed you can build additional ones at the Vehicle Transport Station.
Cost: 1500
Armor: Heavy
Damage: None
Power Demand: 10
Power Supply: 0
GALAXITE STORAGE WAREHOUSE

Add warehouses to increase processed Galaxite capacity. If it is destroyed, sold, or taken over you will lose whatever Galaxite it contains. On the other hand using Corporate Raiders to take over an enemy's warehouse will garner the your enemy's stored credits. This is an excellent offensive maneuver.
Cost: 750
Armor: Light
Damage: None
Power Demand: 7
Power Supply: 0
HUMAN RESOURCE CENTER (HRC)
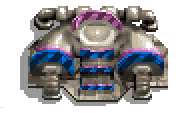
The HRC is used to recruit personnel. You can use the Research & Development Center to upgrade the HRC and enable production of more advanced units. You can build up to ten units at a time by selecting the unit type and repeatedly tapping on the order button.
Cost: 1000
Armor: Medium
Damage: None
Power Demand: 10
Power Supply: 0
VEHICLE TRANSPORT STATION (VTS)
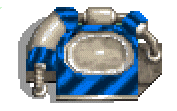
Use the VTS to order vehicles. Upgrading the VTS gives you the ability to create more advanced vehicles. You can build up to ten units at a time by selecting the unit type and repeatedly tapping on the order button.
Cost: 1250
Armor: Heavy
Damage: None
Power Demand: 10
Power Supply: 0
SURVEILLANCE CENTER
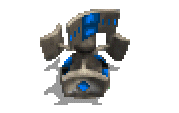
The Surveillance Center controls targeting for both your Gatling Tower and your Rocket Tower. It is required before you can build towers.
Cost: 750
Armor: Medium
Damage: None
Power Demand: 15
Power Supply: 0
RESEARCH & DEVELOPMENT CENTER

Investing in a R&D Center will allow you to upgrade your HRC and VTS, giving you access to the newest technologies available. Note that once the VTS is upgraded you can sell your R&D center to return some of your credits. However, even after upgrading the HRC, if you lose your R&D Center you will be unable to create Corporate Raiders. The R&D center must be intact for these very special units to be available.
Cost: 750
Armor: Medium
Damage: None
Power Demand: 15
Power Supply: 0
GATLING TOWER

These guard towers are equipped with machine guns and are fairly effective at keeping the competition out. A fully powered Surveillance Center is required for the targeting systems to function so that towers will fire automatically as enemies come into range. You can also direct their fire by tapping on the tower and then tapping on the enemy you wish to fire upon. Note that these towers take a great deal of power to remain operational. As you create towers, be sure to keep an eye on your power meter. A flashing lightening bolt symbol on your tower indicates that it is under powered and will not fire at the enemy.
Cost: 750
Armor: Light
Damage: Medium
Power Demand: 10
Power Supply: 0
ROCKET TOWER
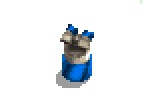
A guard tower equipped with a rocket launcher. These towers are more effective than Gatling Towers but cost more. Like the Gatling Tower the Rocket Tower requires a Surveillance Center and sufficient power to operate. Towers will fire automatically as enemies come into range. You can also direct the tower's fire by tapping on the tower and then tapping on the enemy you wish to fire upon. Note that these towers take a great deal of power to remain operational. As you create towers, be sure to keep an eye on your power meter. A flashing lightening bolt symbol on your tower indicates that it is under powered and will not fire at the enemy.
Cost: 850
Armor: Light
Damage: High
Power Demand: 10
Power Supply: 0
Research Upgrades
Research upgrades allow you to improve the units available at your Human Resource Center (HRC) and Vehicle Transport Station (VTS). The Research & Development Center is available starting on Mission 3. Select this building and use the build icon to view available upgrades. Upgrading the HRC enables production of Rocket Troopers and later Corporate Raiders. Upgrading the VTS enables production of Dominions, Cyclops and other advanced tanks. Not all upgrades are available in all missions. It is worth noting that even after you have upgraded your HRC, the R&D Center must survive to enable production of Corporate Raiders. Therefore you cannot sell this building if you wish to produce these very special units.
ADVANCED FEATURES
GRAFFITI SCROLL
On many devices you can use the graffiti area to move your view of the map. Tap and hold with your stylus and then move it around within the graffiti area.
BUTTON SCROLL
Many devices have pads or buttons that can be used to scroll the map, allowing convenient two-handed play. Experiment with your device.
SELECT MULTIPLE UNITS
You can select multiple units at once. Tap your stylus and drag it diagonally across a group of units. A box will be drawn. When you lift your stylus all the units in the box will be selected. You can change this from a box to a 'lasso' that you draw around the units by checking a box in the Options, Game Menu.
To select units only of a particular type you can double-tap one unit. Other on-screen units of the same type will also be selected.
TIPS
BUILDING OPTIONS
To display the options associated with a particular building tap on the building and select the Build Icon (the white hammer). The units associated with that building are displayed. Note that not all units are available on all missions. As you advance through more difficult missions, additional options are added to the build menus. Some units are only available after upgrading via the Research & Development Center.
TRANSFORMING YOUR HEADQUARTERS
To change your Dominion into a Headquarters you need to bring up the Transform Menu. Tap your stylus on the Dominion and hold it until the Transform Menu appears.
CHANGING THE DIFFICULTY
You can change the challenge level of the game in the Options, Game Menu
UNIT LIMITS
The number of units you can create is limited based on the available memory in your device. When the game reaches the unit limit for your device, a notice is displayed on the lower left-hand corner of your screen. If you notice that all your build buttons are disabled, you may have reached your unit limit.
SPEED ECOM DISPLAY
By default, ECOM messages are displayed a few characters at a time. To display the entire message at once, tap the ECOM text area.
SWITCHING APPLICATIONS
If you switch to another application while playing the game, Warfare Incorporated will pause and be restored when you return.
CREDITS
Warfare Incorporated(TM)
Developed by:
Spiffcode, Inc
www.spiffcode.com
Published by:
Handmark, Inc.
Support:
http://www.handmark.com/support
Credits:
Primary Developers:
Scott Ludwig
Darrin Massena
Additional Coding:
Casey Margell
Shaula Massena
Level Design:
Rob Girling
Brian Othwaite
Test:
Andrew Massena
Testing Testing 123
Story Editing and Dialog:
Elizabeth Chapman
Art/Animation:
Rob Girling
Mark Soderwall
Marketing Consultant:
Lisa Linnenkohl
Additional Thanks:
Special thanks to Val, Nick and Ava
Thank you to the great staff at Handmark, Inc.
|


